How to Install Windows XP
1. Go into the computer setup (Pressing the keys F2, F1, F10, DEL etc) and select the CD drive as first boot device.
2. Insert the Window XP CD in CD drive.
3. After system restart a massage appears on screen “press any key to continue......”
4. You must press any key from keyboard in under 10 seconds.
5. A process of setup is beginning and computer loads some important drivers from window XP CD in CD drive.
6. After some minutes a new window appears as Welcome to setup.
“This portion of the Setup program prepares Microsoft ® Windows ® XP to run on your computer.
• To set up Windows XP now. Press ENTER.
7. You must press ENTER.
8. The next step is Windows XP Licensing Agreement you must press F8 to agree.
9. The next step is The following list shows the existing partitions and un partitioned space on this computer.
• To set up Windows XP on the selected item, press ENTER.
• To create a partition in the un partitioned space, press C.
• To delete the selected partition, press D.
10. If you have partitions you select first partition and press ENTER.
11. If you have no any partition you must create some partitions of your hard drive.
12. If you already have partitions you want to change it you must delete existing partitions and after you create new partitions.
Your values must in Mega Bytes. Some values in MB (1GB=1024MB, 2GB=2048MB) etc.
13. After you select C: partition a new window appears.
14. You choose any of one but I choused the 2nd one.
“Format the partition using the FAT file system (Quick)”.
CAUTION! All data on existing partition will be lost.
15. After this the setup format the partition in few moments.
16. Setup is copying files at the next step. You wait some minutes to complete the process of copying.
17. After completion of copying the computer is restarted.
18. You must change the first boot device from CD drive to Hard Drive.
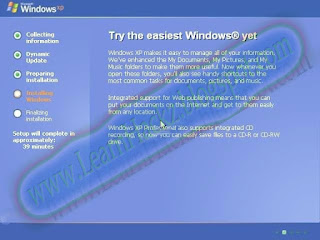
19. After restart a new window appears that shows Setup will complete in approximately: 39 minutes
20. After 6 minutes a new window appears. you must Click Next button to continue.
21. The next window appears you enter the name and organization you wanted. Click Next to continue.
22. At next step you entered the Product key that is written on behind the CD cover. I typed the CD key for [XP Professional Service Pack 2 (2002)]. Click Next.
23. At next step you entered your computer name and password in both boxes. Click Next to continue.
24. The next step you correct your area Date and Time. Click Next to continue.
25. The next step you select Network Settings mark typical settings and Click Next.
26. Again Click Next to continue.
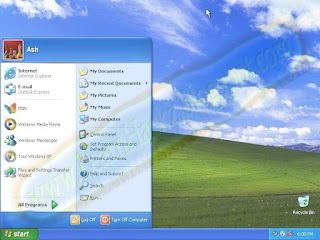
27. After about half an hour your setup is completed and computer is restarted.
28. After restart the next step is Click Next button in right down corner.
29. Repeat previous step again.
30. Click Skip button.
31. Type your desired name in first box. Click Next.
32. Last step is click finish button.
Install the Drivers
|
|


0 Comments:
Post a Comment